
Creating the template
Introduction
The inspection templates are the most crucial elements in our system. With them, you can effectively control any processes within your organisation. We have designed the creator to offer maximum flexibility, ensuring that it covers 99% of your needs.
You can use additional fields, sections, and various types of answers, ranging from simple yes or no responses to automatically detecting localisations.
You can set permissions for a template at three levels: organisation, private, and for specific users.
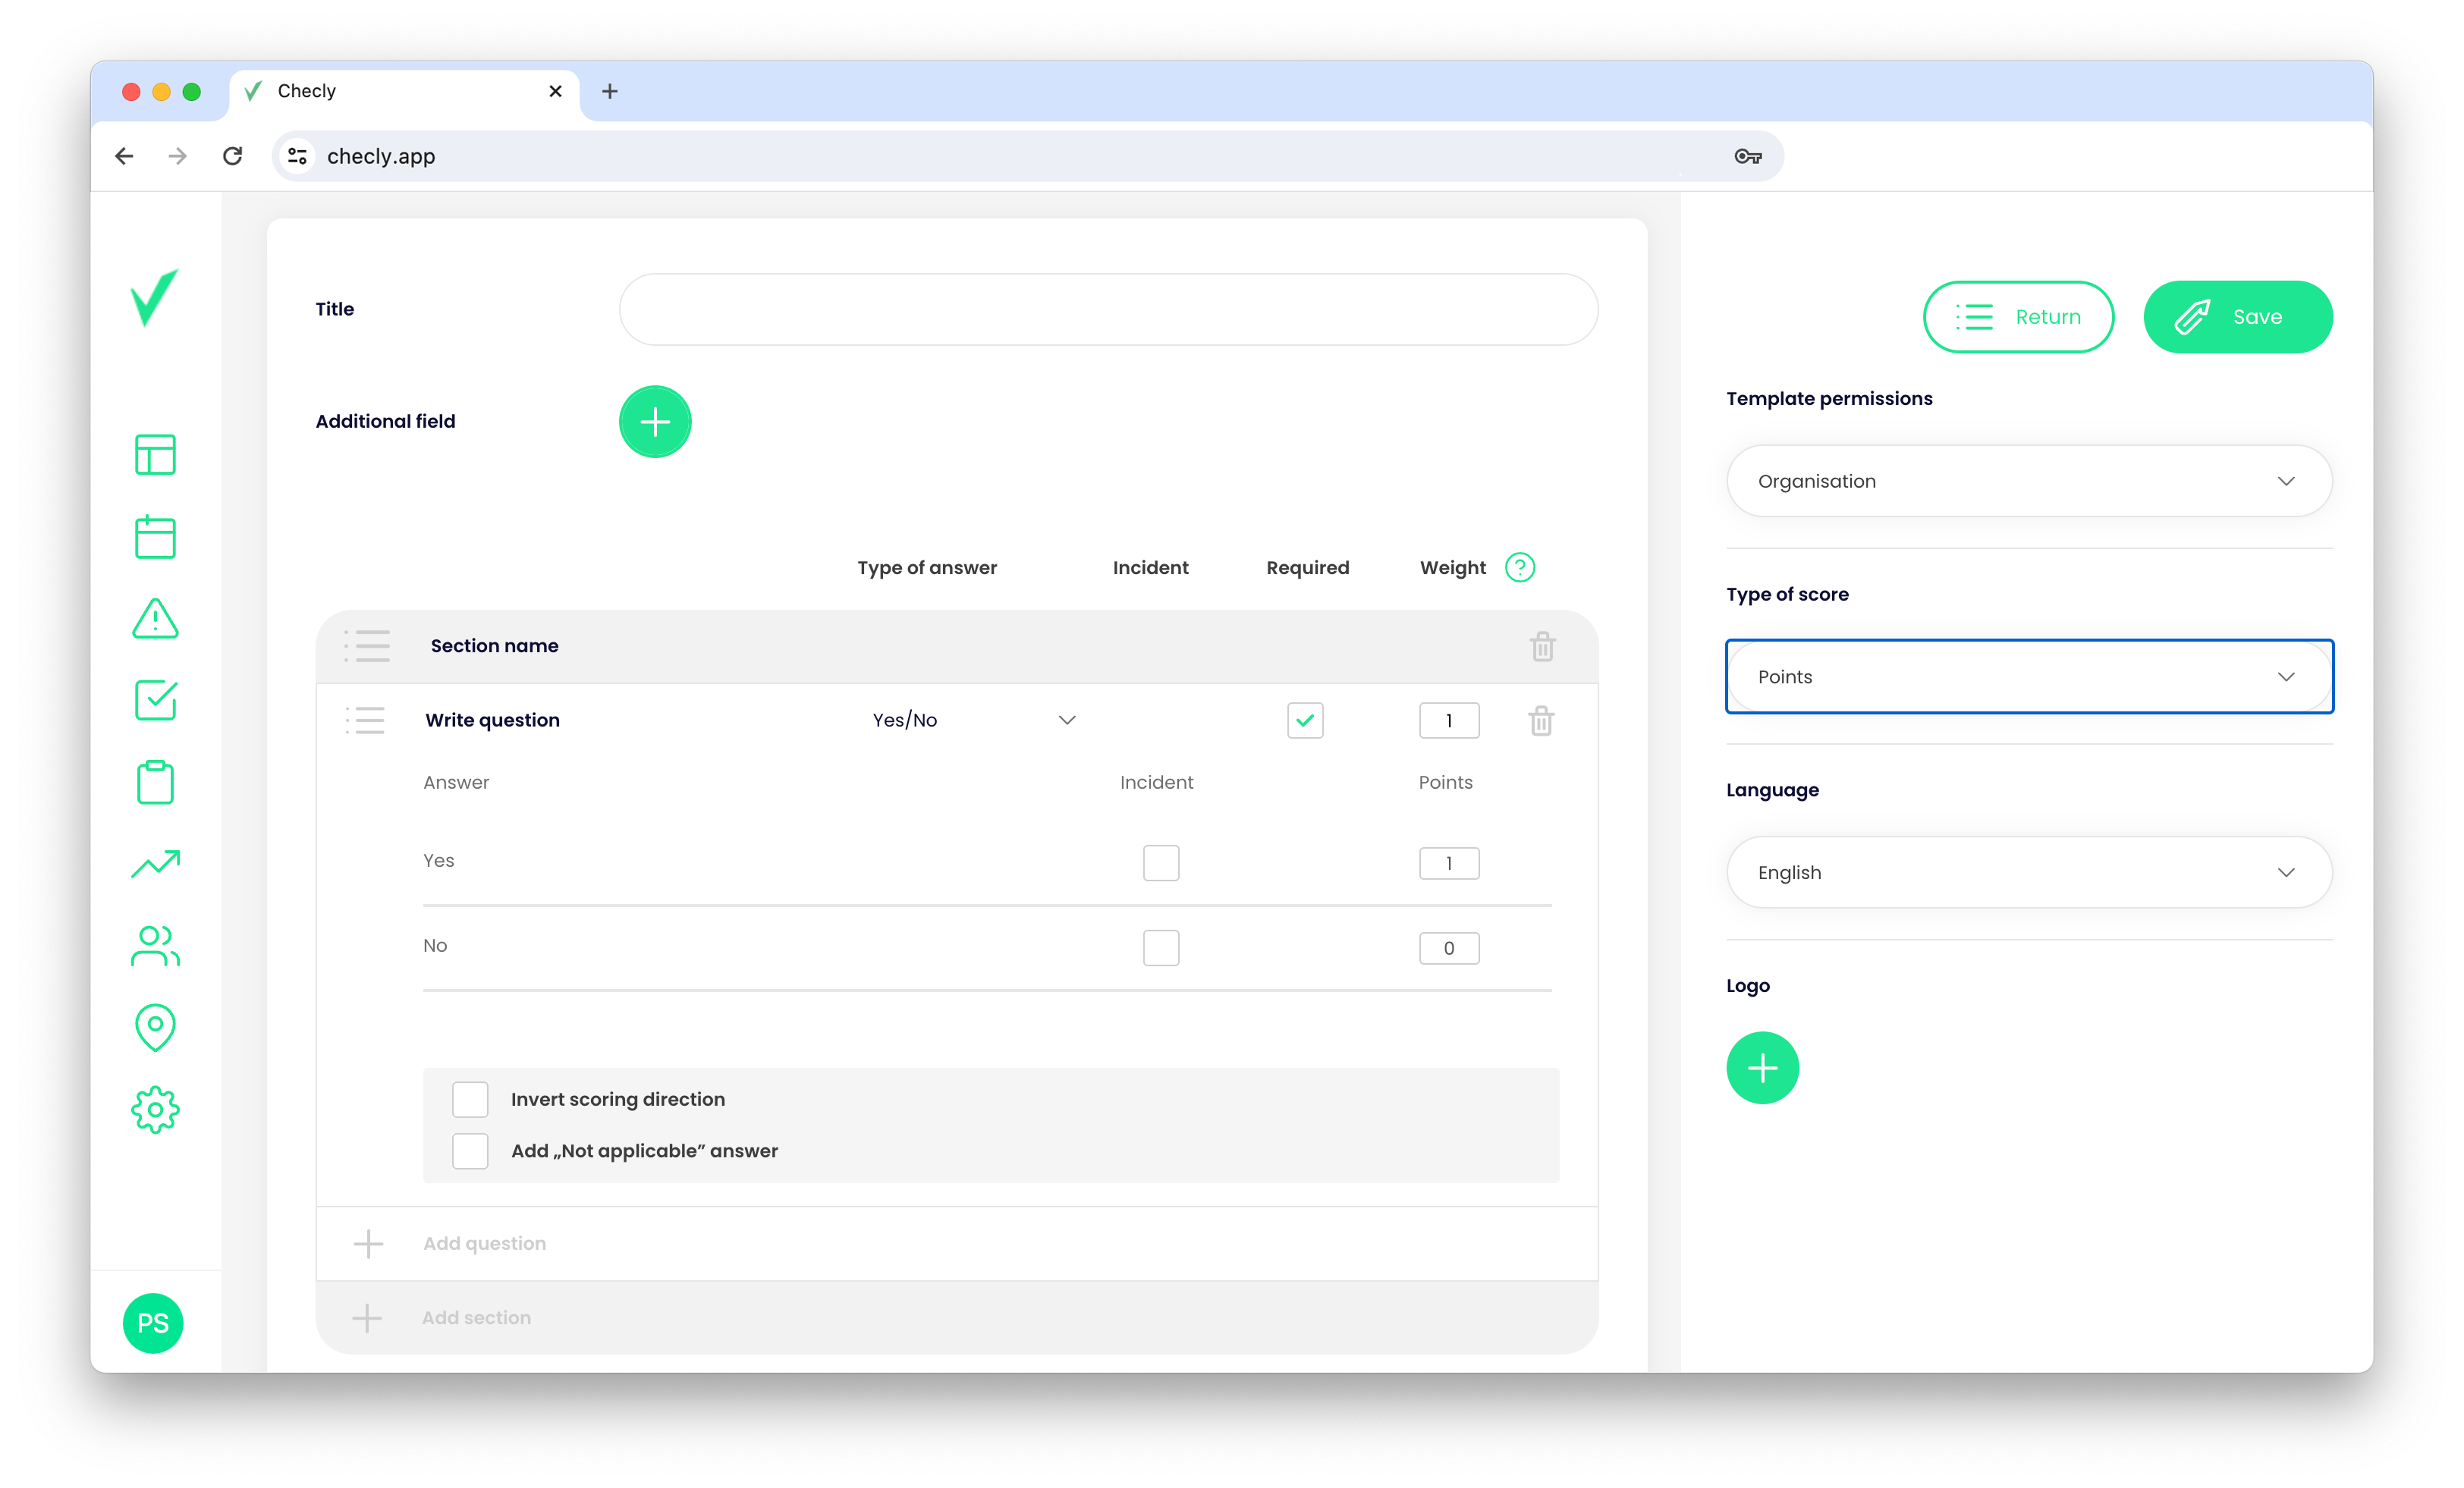
Create a template
In this section, we will guide you through the process of creating a template using the web app. We will cover the essential steps and provide you with a solid understanding of the basics involved in creating templates.
Take note, that this feature is only available for Organisation Admin and Site Admin.
- Log in to the Checly app.
- Select the Library, then click the Plus button, next to the Library header.
- Enter the Title of the template (use easy to recognised title).
- If you want, you can add Additional fields (they will be displayed on the report's top table.) using the Plus button.
- Click the Add section to add the first section to the inspection.
- Enter the name of the section.
- Click the Add question and write it.
- Choose the type of answer.
- If you want, you can mark the answer as incident and set its type (normal or urgent).
- Set the weight of the answer. (The higher the value, the more relevant the answer is to the calculation of the final score.)
- (Optional) You can add the "Not applicable" answer if you want - available for specific answers.
- (Optional) Also, you can invert the scoring direction - available for specific answers.
- When you have added all sections and questions, you can easily delete them (bin icon) or reorder them (list icon).
- In the next step, you have the option to set the permissions of the template. There are two choices available: Organisation and Private. If you select the Private option, you can use the search function to add specific users and grant them access to the template.
- The penultimate step is to choose the type of score from the options of Percents and Points.
- In the last step, you will set the language of the template. Please note that the application does not automatically translate the question.
- In the final step, you can upload your logo in either JPG or PNG format, with a maximum file size of 4 MB.
- Click the Save button.