
Users overview
Introduction
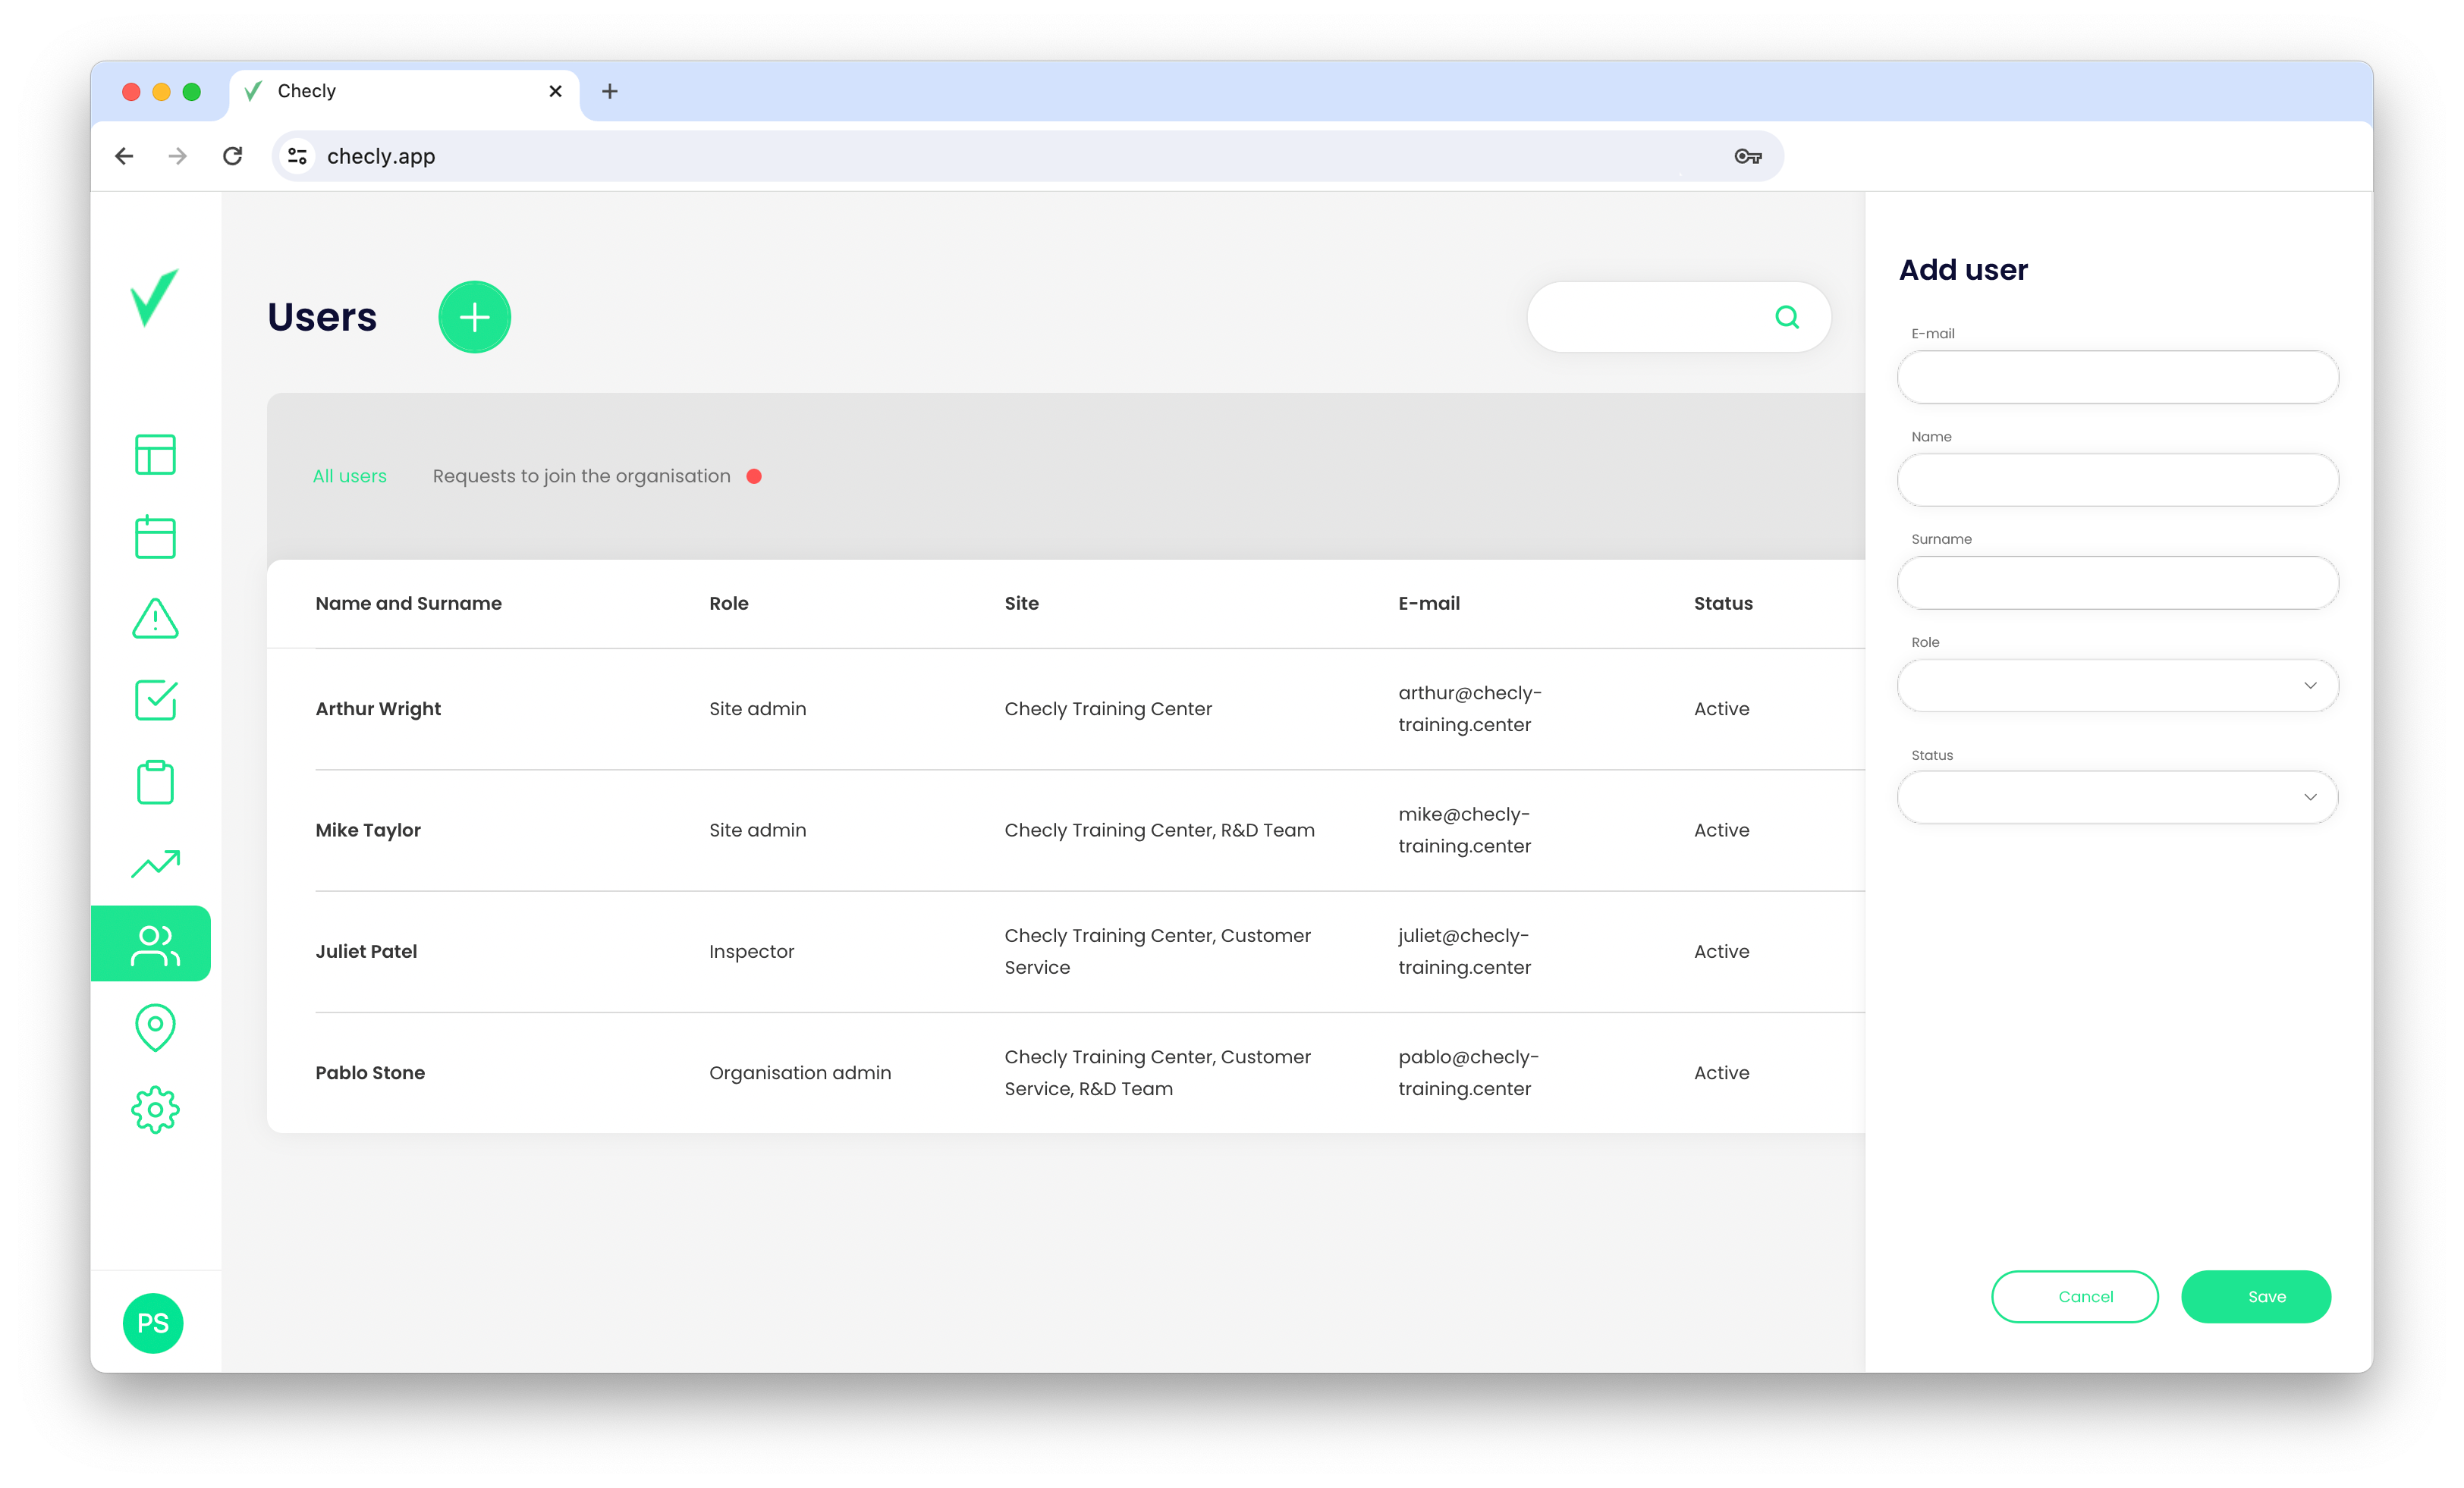
There are three types of roles in Checly. You can easily create and manage users in the Users view.

On the Users view you can find:
- Add user button
- Search box
- Dropdown list with all sites assigned to the logged user
- Two tabs
- All user
- Request to the join to organisation
- List of created uses
Create a user
- Click the Plus button.
- Enter the user's e-mail.
- Enter the user's name.
- Enter the user's surname.
- Set the user's role.
- Set the user's status.
Edit and delete the user
You can easily manage the users by accessing the 3-dots menu on the Users page.
Allow and deny access to the organisation
If your organization has requested an access policy, you can find all the requests in the Request to join organization tab. From there, you can decide whether to allow or deny access for each user.

Limits of users
There are no user limits in the Pro and Team plans. Adding a new user affects the invoice value for the next billing period.
Limits in the Enterprise Plan are set on an individual basis and changing them requires contacting us at hello@checly.app.